The action figures of our favorite superheroes have always been a source of joy for our children as well as us, even in adulthood. What if you take this to the next level and 3D print the miniature version of your favorite heroes? Sounds exciting, not?
3D printing technology has advanced to the point where such a thing is possible, and the results can be surprisingly realistic. This blog post will discuss how to 3D print the miniature version of your favorite superheroes and the associated cost, design, and material considerations.
Every Materialistic Creation Needs Some Resources
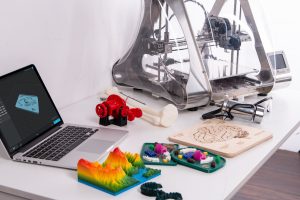
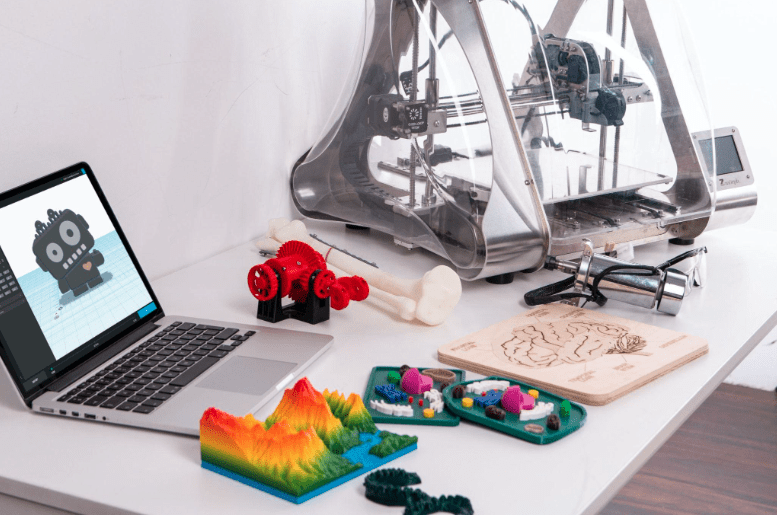
First things first, to 3D print the miniature version of your favorite superheroes, you will need to gather a few supplies. One 3D printer, some plastic filament, and a computer with 3D modeling software will do absolutely fine.
Depending on the size and complexity of your creation, you may also need print supports, a slicer, a surface finish tool, and a heat gun.
However, if you are wondering where to get these supplies, you can check out the online retailers or local stationery selling 3D printing goods.
A 3D printer for miniatures is usually available at any electronic computer store, but based on your specific needs, the product should be carefully picked to have the optimum printing performance.
Plus, depending on the miniature size you want, you may also need different filament materials, such as PLA, ABS, or PETG. So, be sure to choose those wisely too.
3D Printing is Cakewalk When You Learn It
With a 3D printer, you can make customized superhero figures with great detail and accuracy. You can choose from various materials to create a unique look and feel.
In addition, the process of 3D printing makes the entire process easier and less expensive than traditional methods.
So, how exactly is this miniature 3D printing done?
Step 1: Set Your Vision
The first step in creating a piece of art is to develop a vision for it. You’ll use this vision to guide the entire creative process, ensuring that every element works together seamlessly.
To have a clear concept, you may take some reference images and look through old photographs of the character you want to print out. From there, you can easily sketch out ideas for how you want to translate the character poses into a 3D model.
Start sketching out different designs and settle on a specific design that combines the hero’s accurate look and style, paying close attention to details such as armor, clothing, and other accessories.
Once you have your final draft, it’s time to move further in the printing process.
Step 2: Create a Basic Base Figure for the Model
Creating a basic base figure for 3D printing a miniature version of superhero characters is simple.
To begin, select a 3D modeling software to build a base figure that is as
close to the original character as possible. It is important to consider the scale of the miniature before starting, as this will affect the size of the base figure.
Once the scale has been determined, begin creating the base figure. Start by constructing a simple base shape, such as a cube, and manipulate the vertices to create the basic silhouette of the character. when
Lastly, once the basic shape is complete, add details such as arms, legs, and clothing and export the model in a 3D printing-compatible file format with all adjustments made.
Step 3: Prepare the 3D Model Printer
When preparing a 3D printer to produce miniature models, it is important to ensure that the machine is well-maintained and in good working order.
Before the operation, check all moving parts of the printer and lubricate the necessary parts for better functioning. Also, remove any debris or dust from the machine.
Next, the print bed should be leveled, and the filament feed system should be checked for proper feeding and alignment. Plus, the printer should be calibrated to ensure the model is printed correctly.
Once the printer is prepared, you can create the miniature model using a 3D modeling software package and print it onto the printer.
This process is relatively simple but requires attention to detail to ensure that the model is printed correctly and precisely.
Step 4: Print Your Model Layer-by-Layer
Now, it’s time to consider the layer-by-layer printing process; this involves printing a single layer of material at a time and allowing each layer to cure before printing the next.
The advantage of this process is that you can create complex models with intricate details by slowly building them up.
Additionally, this process will allow you to create lightweight and strong models due to the curing process, which bonds the individual layers together.
So, once your printing design, the sculpted base of the model, and the 3D printer are ready, start printing the final product in layers.
Step 5: Give Your Favorite Printed Character a Polished Look
Processing 3D prints of miniature superhero characters requires sanding and painting to create a professional finish.
First, use fine-grain sandpaper to lightly buff the print’s surface, paying particular attention to any layers or ridges. When the surface is as smooth as you want it to be, wipe away any extra dust with a moist cloth.
After the print has dried, apply a primer coat to the surface, ensuring even coverage. Then, use a paintbrush to apply a layer of acrylic or enamel paint.
Lastly, after the paint has dried, an optional top coat of varnish can be applied to protect the finish further.
Try These Additional Tips in 3D Printing.
The correct type of filament should be chosen for the model. This will depend on the desired result, as some materials are better suited to complex objects while others are better for durability and strength.
The model should be printed at the correct resolution and layer height to ensure that the finest details are captured.
Familiarize yourself with the 3D printer’s software settings to ensure you achieve the desired quality and accuracy.
Use a support material for overhanging or unsupported parts to ensure the model does not warp or break during printing.
Select the correct nozzle size for your 3D printer. A large nozzle size will help you achieve a smoother surface finish.
If you are printing a complex object, consider creating the model in separate parts, then assembling them after the 3D printing process is complete.
If you want your 3D print to adhere better to the build plate, consider utilizing a hot bed.
To fine-tune the look of your 3D print, use post-processing techniques such as sanding, priming, and painting.
Finally, experiment with different slicing software to find the best results for your particular 3D printer and model.
Key Takeaway
3D printing is a fantastic technology that has revolutionized the way we create things, and miniature versions of our favorite superheroes are just one of the many cool uses it can be put to.
Whether you are an artist, a collector, a fan of pop culture, or someone who wants to make a unique gift, just 3D print the miniature version of your favorite superheroes.
From comic book heroes to movie stars, you can find a 3D-printed version of almost any character. Plus, the customization options make it possible to create the perfect model for your collection.
So, what about trying it out?
FAQs
What are the easiest things to 3D print?
Various items can be 3D printed, and some items are easier to 3D print than others.
Generally speaking, items composed of simple geometries, such as cubes, cylinders, and spheres, are the easiest to 3D print.
Additionally, items lacking complex curves, angles, and other intricate details are also easy to 3D print.
How do you make a 3D model for beginners?
For beginners looking to make a 3D model, many software packages are available to assist in the process.
The first step is to design the model’s fundamental shape in 3D. Next, the user can apply color, texture, and lighting to the model using the software’s tools. At last, the user needs to render the model and export it to various 3D formats.
What are the five steps of 3D printing?
The five steps of 3D printing are as follows:
(1) preparing the 3D model in a 3D modeling software;
(2) dividing the 3D model into a large number of horizontal layers;
(3) generating code for each layer and transmitting it to the 3D printer;
(4) feeding the appropriate materials into the printer;
(5) layering, curing, and cooling the 3D printed object.