How I got all my Game’s Art for $3000
It is not a secret that there are hundreds of newcomers in game development all around the world who are dreaming about creating their own unique and outstanding game.
They start with innovative interesting ideas, create concepts, and scripting, but then people come up with the question: “Where can I find cheap yet quality 3D art? Can I hire a team of 3D game artists?”
And almost always these questions stay unanswered, and games are left forgotten.
But how cool it would be if young artists knew what to do! If there was a guide or a helpful list, so many amazing projects would have been presented to the world!
When I started working on my first game, I had the same thoughts and feelings. Obviously, hiring a 3D art company is the best solution for people who want to make a professional and outstanding title. But, unfortunately, some young artists have a limited budget so they should look for other affordable ideas.
In the beginning, I understood that there might be problems with free assets. Unfortunately, I didn’t have many skills to create professional game art by myself, too.
Another option was to collaborate with independent shops and freelancers, who specialized in game art, but this option was quite costly, so I dropped it.
But it wasn’t the end of my story. Bit by bit, I gathered information until I had gotten all my Game’s Art just for $3000, exactly as my budget was. Today, I will share my small secrets with you.
With big hope, I want this guide to be helpful for a lot of beginners and interested in game art people who want to create a game but don’t have much money.

Start with your needs | What elements of game art can be in real games
The world of 3D game art is huge, and there are a lot of significant details from the characters to the cutscenes. So, it’s important to assess the specific needs of your game and what game art elements your game will have. You can define that by understanding the genre and main idea of your game.
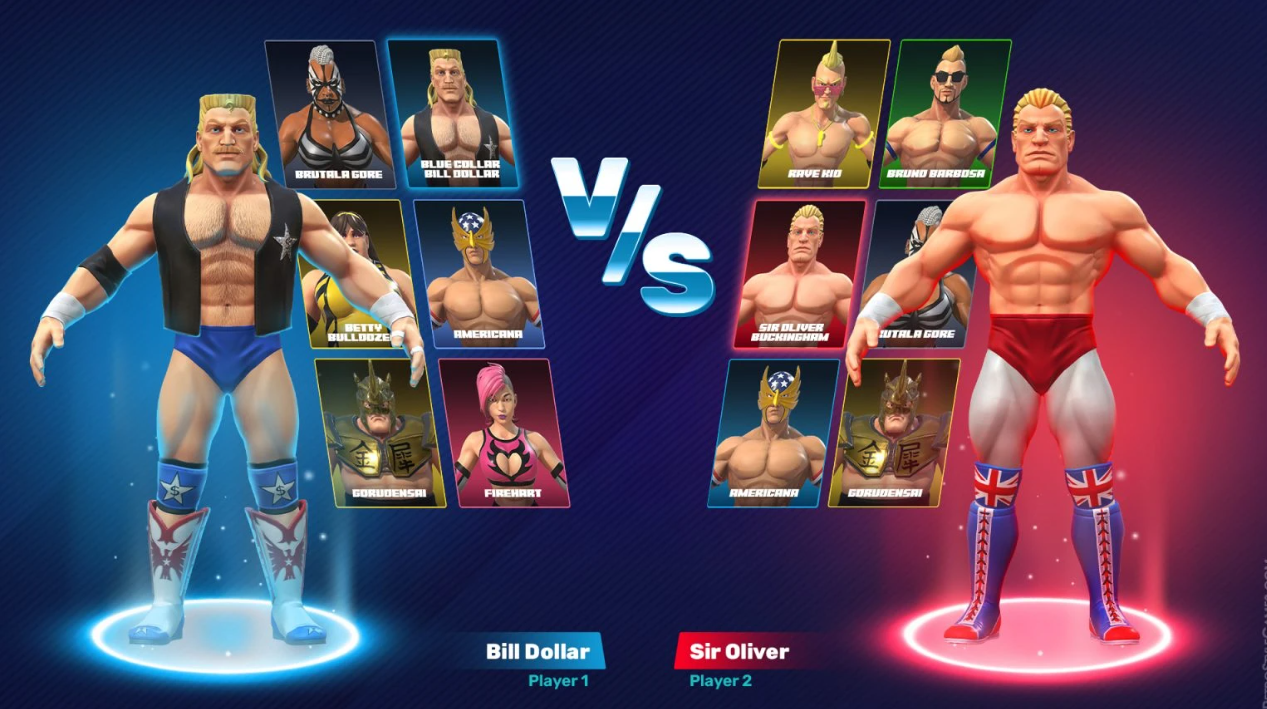
For instance, in my experience of fighting game creation, I gave the most attention to animation development. (got some inspiration from Ultra Pro Wrestling)
The visual elements you choose will play a significant role in shaping the experience of players and defining the overall aesthetic of the virtual world. The most common 3D game art elements to consider when evaluating and determining your game’s requirements are game environment design, game character design, and game animation. So, I’ll tell you in detail about them.
Game Environment Design
While developing my game, I worked a lot on game environment design. Without it, any game would be so engaging and fantastic. Take, for instance, the game Witcher 3. Its outstanding environment design is an inspiration for a lot of game developers, and for me too.
While fighting, all the details around help players, give them hints and understanding of how to beat one or another enemy.

It works for every game. If you need a realistic landscape or a fantastical city, you can find low-cost and quality 2D or 3D art. The main point is to find something you can stand out with and suggest a realistic game experience to your audience. Whether it’s a pixel game or a 3D AAA title, gamers should feel the game, its atmosphere, and its aesthetic. Game environment design is the best to reach these aspects.
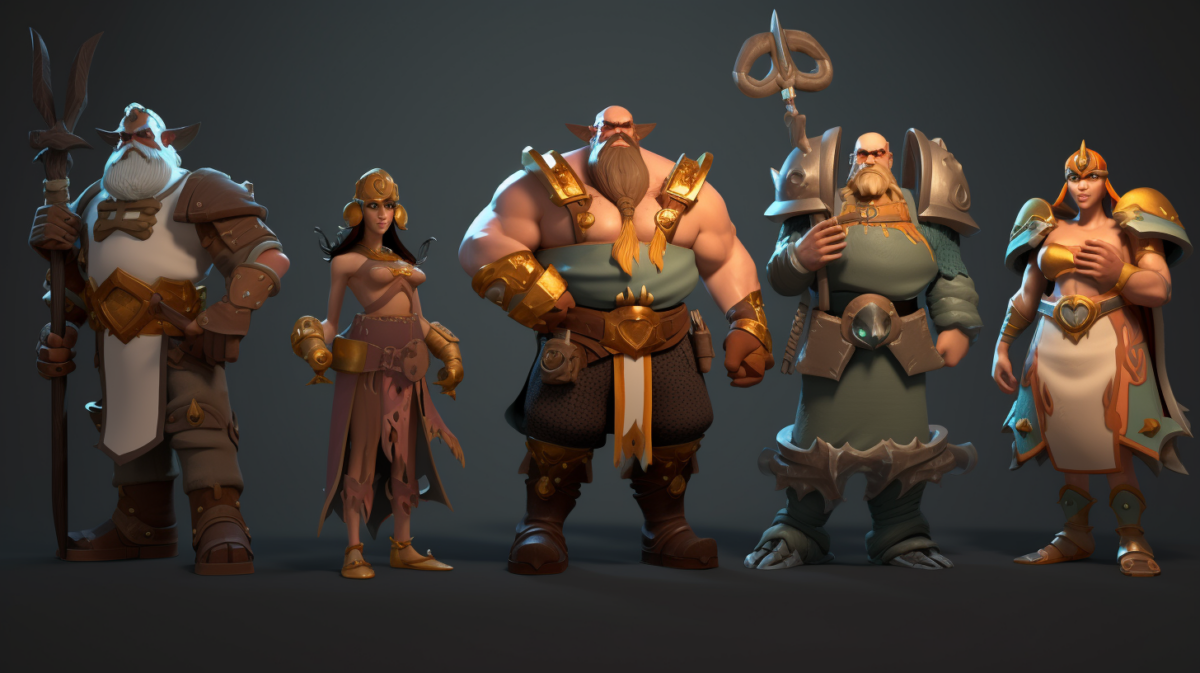
Concept Art for Characters
Working on concept art for characters is one of the most difficult processes while creating a fighting game. It took me a lot of time to finally understand what characters I wanted to see in my fighting game.
Everything started with the overall theme of my game. I have already known it would be a fighting game. So, there wasn’t a question will it be set in a futuristic world or a historical castle?
But for you, you need to define everything from the beginning because your environment, characters, and object designs should look like a single entity.

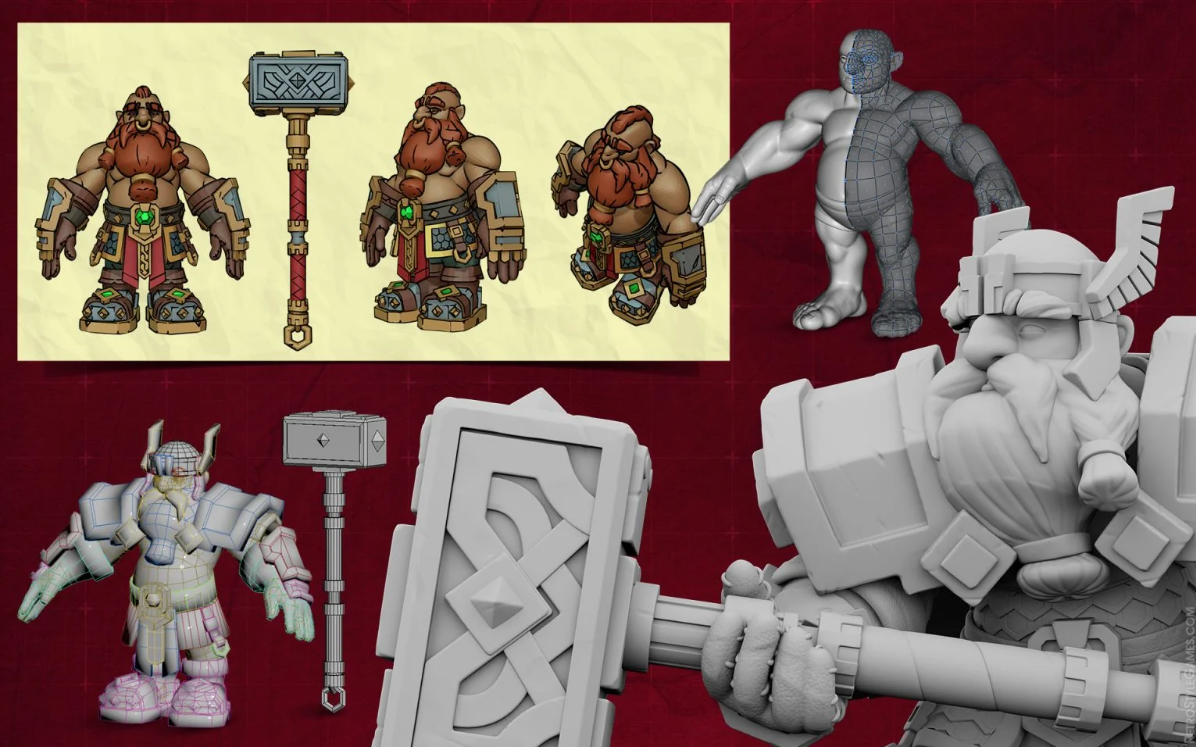
To be honest, I also always look for references from various sources before starting to work on the project. I decided my game to be in the fantasy realm, so I searched for this kind of inspiration on the web. As a result, I found exactly what I needed: 3D game art studio RetroStyle Games. They have a lot of projects in their portfolio, so there was where to run. Of course, one company isn’t enough for all potential ideas and concepts but you still should find your number 1 for catching inspiration.
Exactly like RetroStyle Games was my number 1 while working on the fighting game 😉
What I also liked is that they give free design offer for indie developers, which can also be a game-changer for small development budgets.
Game Animation
This aspect depends a lot on the genre of your game. For instance, if you’re working on an endless runner, you probably don’t need fighting animations in your game. For me, my main focus was on various battle mechanics. The main point of good animations is to make movements responsive and intuitive, contributing to the full player’s immersion.
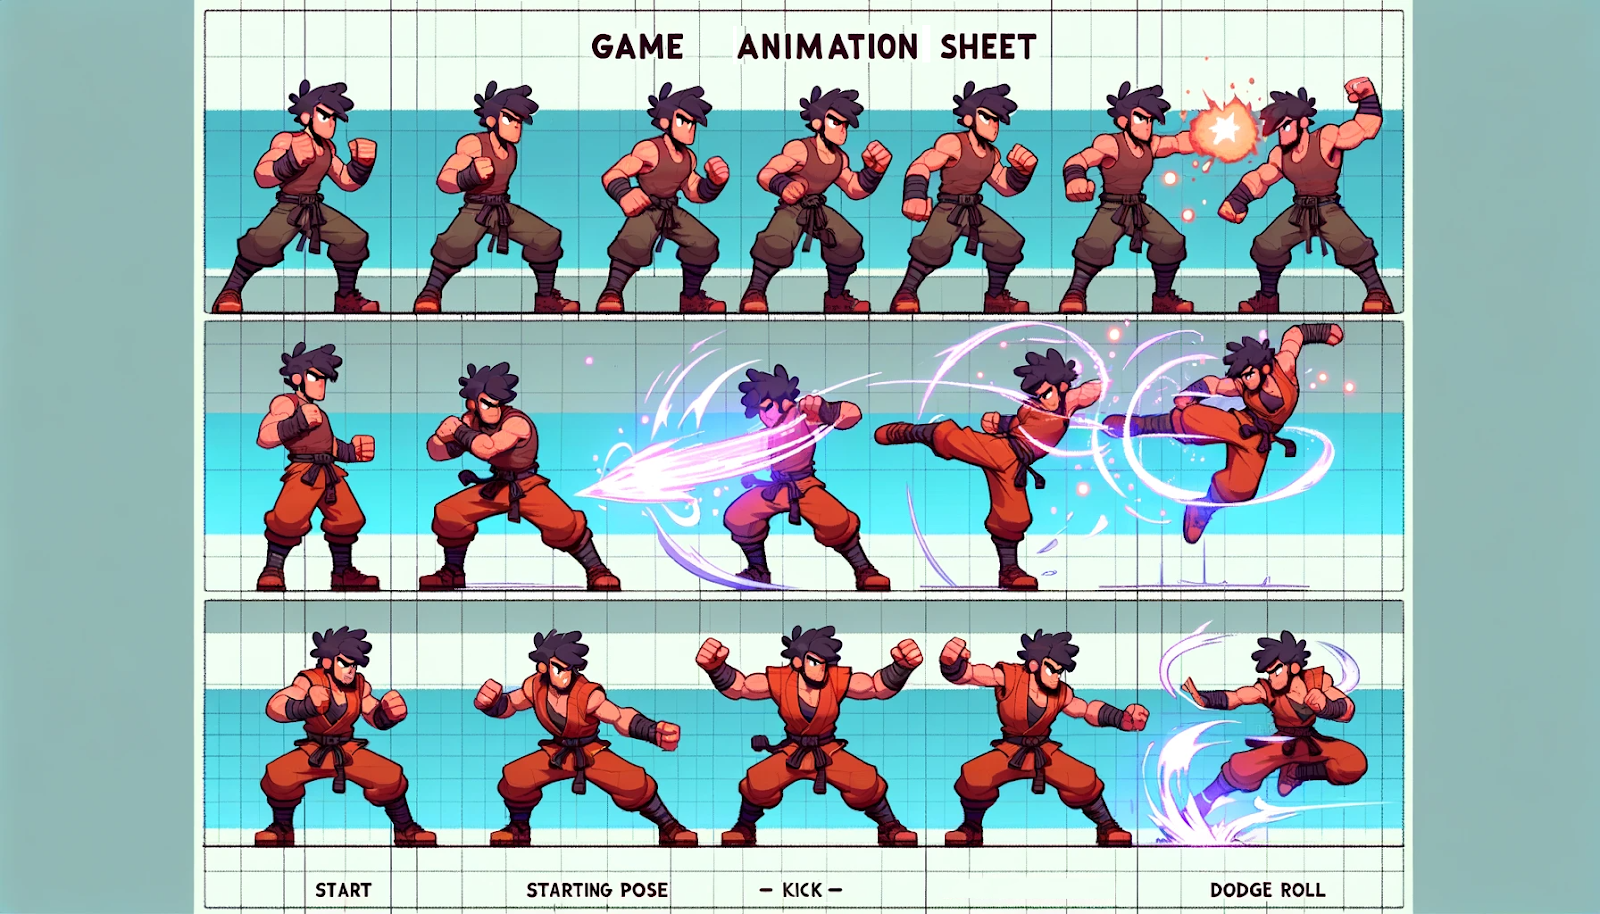
It doesn’t matter what genre of game you choose to work on: the creation of smooth transitions between different actions is always very significant. My recommendation: pay attention to the perceived weight of characters and objects. Whether it’s a powerful punch or a light-footed landing, animations should convey a sense of weight and impact.
What affordable options do we have for game development?
Many newcomers think that working on game dev art is always very expensive and unaffordable. I thought the same when I came up with an idea to make a 3D dwarf model for my fighting game. Now, I want to dispel these thoughts: assets stores and freelance platforms are perfect options for beginner 3D game artists!
I found out about asset stores when I was discovering the potential of Unity and Unreal game engines. Unity offers a wide variety of 3D models, including characters, props, and environments, but has limited customization for unique character requirements. Similar to the Unity asset store, Unreal marketplace provides a range of 3D models but also faces the same issue of asset uniqueness.
One more problem is that it’s very difficult to find something exactly what you’re looking for. For instance, the image of the 3D dwarf model in my head was completely different from what I’ve seen in asset stores. If you have similar issues, it will be better to work with other options, such as freelance platforms.
In my opinion, Upwork and Fiverr are the best for beginner 3D game artists. Upwork connects you with freelance 3D modelers so you can find experienced artists at various price points. You should remember that costs can vary, and quality is dependent on the chosen freelancer. In return, Fiverr offers a range of pricing options, including budget-friendly gigs. Of course, quality may vary, and additional costs can accrue for revisions or more detailed work.
Talking about price, freelance pricing varies from low-end to high-end.
Low-end (basic 3D models with limited details and customization) is about $50 – $200.
Mid-range (more detailed models, potentially with basic animations) is from $200 to $500.
High-end (customized, high-quality 3D models with a lot of details and animations) is around $500 and above.
What about asset store pricing? Typically, it ranges from a few dollars to a couple of hundred dollars for premium, highly detailed models.
Hiring Freelance Artists Without Breaking the Bank
A cost-effective decision to get 3D art for the game is to collaborate with freelance 3D game artists. You can find them on the freelance platforms I’ve mentioned before (Upwork or Fiverr). But I want to give you some recommendations that will save time and money.
Firstly, clearly outline the requirements, style preferences, and deliverables for your project. This ensures that both you and the artist have a clear understanding of the expectations. Secondly, determine a budget for your project based on your financial constraints. Be transparent with freelancers about your budget from the beginning to attract those who are willing to work within that range.
Thirdly, based on my experience, it’s better to look for artists whose style aligns with your project. It would be even better if they have already had experience in working with your style and genre. Fourth, I recommend you initiate the collaboration with a smaller task to assess the freelancer’s skills, communication, and reliability before committing to a larger project. Believe me, it will help you a lot.
Don’t forget to draft a clear and concise contract outlining project details, payment terms, and ownership of the work! This legal document protects both parties and helps avoid potential disputes.
I know all of these things only because I collaborated with a freelance 3D game artist before. While working on my fighting game, I found an artist whose style resonated with my game’s theme. Because I am an indie game developer, I wasn’t 100% sure about the guarantee of the perfect result. However, regular communication ensured alignment throughout the project.
Unfortunately, we had some budget disagreements but the 3D game artist was willing to accommodate within the specified budget by simplifying certain elements without compromising quality. In general, due to this advice, the collaboration was successful, resulting in unique designs that improved my game a lot.
Public Domain and Royalty-Free Assets
One more effective and quite cheap way to enhance your game’s visuals is using public domain and royalty-free assets. You should remember that game dev art in the public domain is not protected by copyright and can be freely used by anyone for any purpose. In return, royalty-free doesn’t mean the art is in the public domain; it means you can use it after paying a one-time fee, and in some cases, without paying any fee.
If you want such art to fit your game, listen to my recommendations:
1. Check license details.
Even for public domain works, it’s essential to verify the license terms. Some public domain images may have specific conditions, such as attribution requirements.
2. Understand usage restrictions.
For royalty-free assets, understand any usage restrictions specified by the license. Some may limit use in commercial projects or require notification of use.
3. Adaptation and modification.
To fit your game’s style, consider adapting or modifying the art to align with your aesthetic. This could include adjusting colors, adding details, or resizing.
4. Combine multiple sources.
To create a more unique visual style, consider combining elements from multiple public domain or royalty-free sources. This can result in a distinctive look that suits your game.
5. Use vector formats.
If possible, work with vector formats like SVG for easier modification without loss of quality.
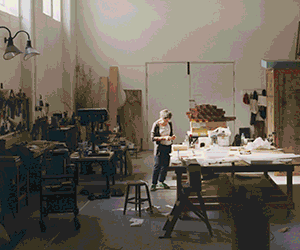
Developing Simple 3D Art In-House (DIY)
One more thing you can try to do is to create simple 3D art in Blender by yourself. Of course, it may be a time-consuming process but you can do it for free and with your vision. And, the question: “Where to get 3D art for the game?” will be rhetoric. Here’s a step-by-step guide based on my own experience:
Step 1: Start with installing Blender:
Download and install Blender from the official website. It is a powerful and free open-source 3D creation suite.
Step 2: Launch Blender.
Open Blender and familiarize yourself with the interface. The default layout includes a 3D view, a timeline, and a properties panel.
Step 3: Add a basic shape.
In the 3D view, press Shift + A to open the Add menu. Choose “Mesh” and select a basic shape like a cube, sphere, or cylinder.
Step 4: Navigate in 3D view.
Use the middle mouse button to rotate the view, the scroll wheel to zoom, and the Shift + middle mouse button to pan.
Step 5: Edit mode.
Press Tab to enter Edit Mode. Here, you can manipulate individual vertices, edges, or faces. Experiment with selecting and moving these elements.
Step 6: Extrude and scale.
In Edit mode, select a face and press E to extrude, creating the new geometry. Use S to scale and manipulate the shape. This is the basis for creating more complex forms.
Step 7: Materials and textures.
Switch to the “Shading” workspace to apply materials and textures. Experiment with adding colors, adjusting shaders, and adding simple textures to your model.
Step 8: Lighting.
Switch to the “Layout” workspace, and use the default lamp or add new light sources. Experiment with different lighting setups to enhance the appearance of your model.
Step 9: Rendering.
Switch to the “Render” workspace. Adjust render settings and use the “Render” button to see how your 3D model looks in its final form.
Step 10: Export.
Once satisfied, export your model by selecting “File” > “Export” and choose a format such as .fbx or .obj, depending on your needs.
It may look quite difficult but once you start, it will be very easy. Just try!
Maximum use of a small budget
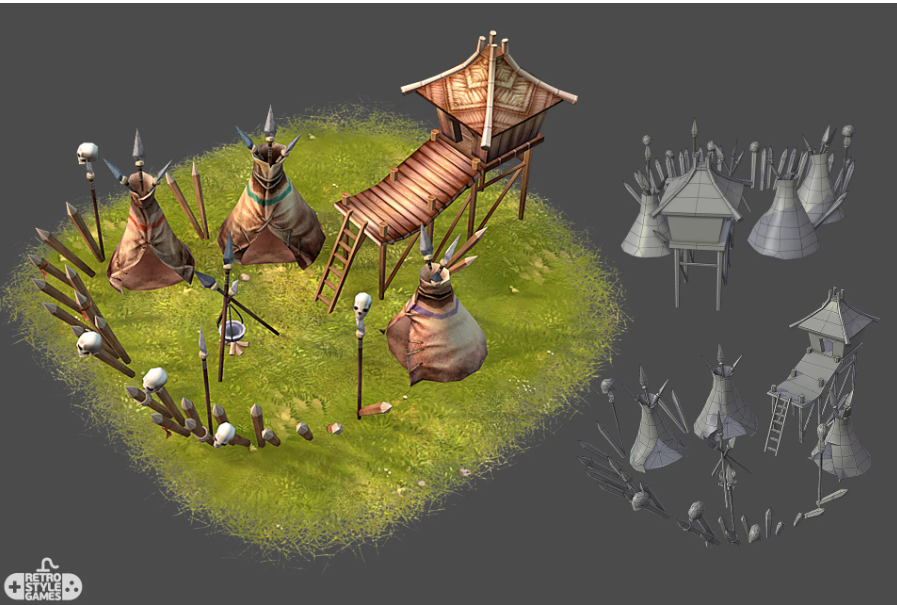
I’ve already mentioned the RetroStyle Games 3D game art studio but it’s never too late to do it one more time. They became my inspiration not only because of their fascinating projects but also due to their approach of getting maximum by using minimum (for instance, a small budget).
The most perfect example here is the game Merge Manor: Sunny House with more than 1 million downloads and more than 50 thousand reviews. It’s crazy, isn’t it?
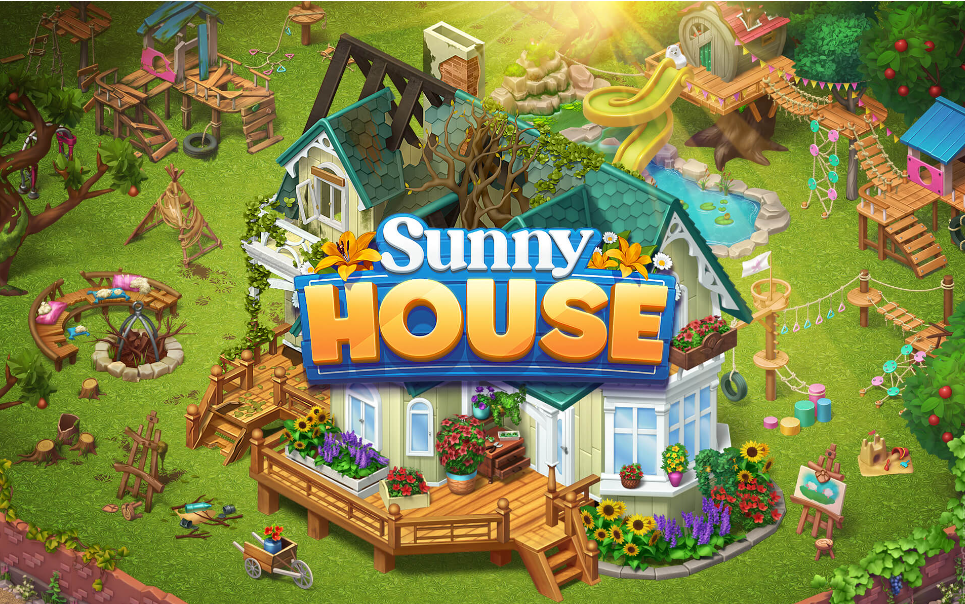
The sense of the game looks quite easy: clean and decorate the huge garden while playing intricate puzzles on the unification of subjects. But the game art and gameplay here are outstanding! RetroStyle Games, a 3D outsourcing studio, helped CookApps, a game-developing company, create a set of 6 unique locations that changed the game atmosphere and made it unique.
For creating isometric sprites, a studio combined both 2D and 3D technologies. They also created concept art and worked on 3D modeling, creating materials, texturing, and rendering. As you can see, a lot of job was done. How long did it take? Small locations took from 26 to 33 days. Medium locations such as Playground or Terrarium Fountain took from 44 to 50 days. And large locations with numerous sprites could take up to 70 days.
In general, they have done a great job, of ensuring cost-saving and high-quality content. For me, this is what everyone should look up to.
And so, I’ve spent the development of my own game just…
I don’t want to delay too much: I’ve invested $3000 and three months of work into the development of my game. I’m still shocked because of this fantastic result. How you can reach it too?
1. Use affordable game development.
Utilize affordable options such as freelance artists, asset stores, and free software to manage costs effectively.
2. Be accurate while collaborating with freelance 3D artists.
When working with freelancers, clearly define project scope, set realistic budgets, communicate effectively, and negotiate terms upfront.
3. Use public domain and royalty-free assets.
Understand the licenses of assets, attribute them properly, and adapt them to fit your game’s style while respecting the original creators.
4. DIY 3D art with blender.
Create simple 3D art in-house using free tools like Blender. Follow a step-by-step guide I gave you, experiment with basic shapes, and gradually explore more advanced features.
Be mindful of your budget and invest time wisely. Start small, experiment, and find what works best for your project.
Only with this approach, you will be able to create a fascinating game with a small budget! Remember, the game development community is vast, and learning from each other’s experiences is invaluable. Embrace these strategies, adapt them to your unique project, and continue building amazing games.
Wishing you all success in your game development journey!